How To Establish Motivated Lighting for Natural Looking Interviews | Shutterstock Tutorials
Now Playing
How To Establish Motivated Lighting for Natural Looking Interviews | Shutterstock Tutorials
Transcript
296 segments
our cameras capture this world in a
two-dimensional space and it's our job
as filmmakers or photographers to make
that two-dimensional image look more
three-dimensional and one of the most
powerful tools to be able to achieve
that is lighting lighting helps us add
shape and texture and dimension to our
scene so real quick we're going to take
a look at this interview scene i'm going
to show you how i went from this shot to
this shot all using lighting
[Music]
hey everyone tyler edwards here i'm a
filmmaker and dp and i have chelsea here
sitting in as the talent for this
interview setup and um well it's now
storming i set all this up before it
started storming but that's the good
thing about continuous lighting is your
set never really changes with continuous
lighting so in this video i'm going to
show you how i set up all the lighting
and what the motivation for these
different lights for so that being said
let's go ahead and jump into it so real
quick we'll kind of take a look at the
frame we've got here we've got this
nice big bay window here some nice
kind of evening looking sunlight coming
in through the background we've got a
lamp going on uh just a nice
casual looking interview set up and
everything looks nice and natural and
that's kind of what we're going for in
this setup so let's go ahead and jump
into it and first talk about the key
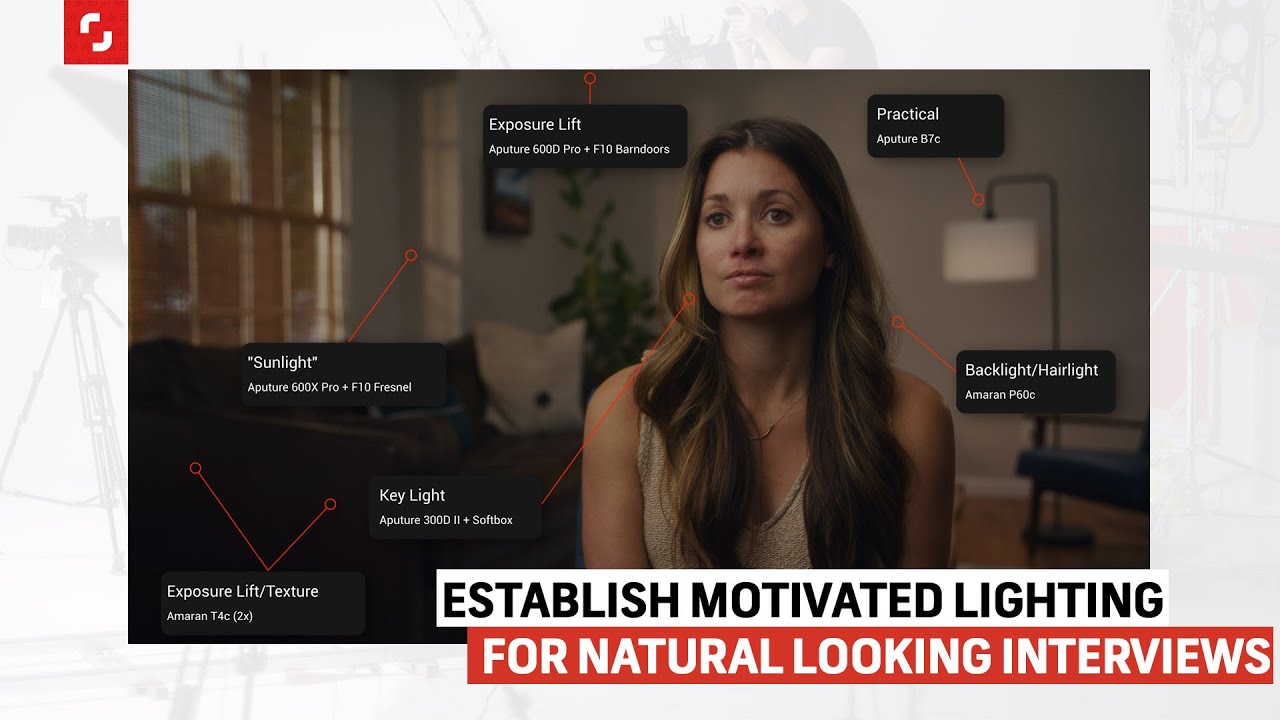
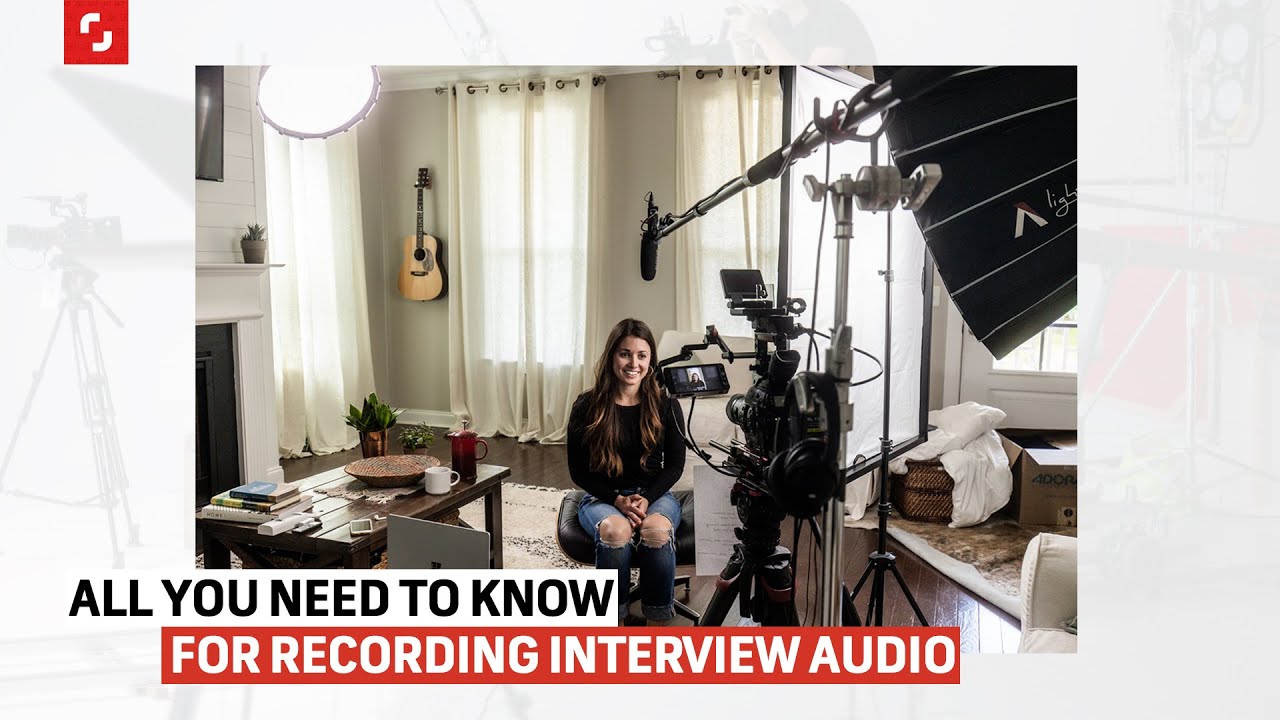
light all right so for our key light we
have the aperture 300d mark ii inside of
this giant softbox the reason why i have
it isn't in the soft box is to make this
key light nice and soft because that
300d is a point source light meaning it
starts off as a really hard light source
so we want to make that light source
bigger and softer
so that's why we're using this soft box
here now as you can see here there's
this giant window this kind of like bay
window right here
that is kind of the motivation for our
key light so as you can see if you look
at the frame that light is coming from
the same side as that window and i've
intentionally put a little bit of this
window inside of the frame of the camera
where you would expect that light to
come from so if i had the key light on
the other side of chelsea here it would
look really unnatural because our eyes
would expect to see the light coming
from this window that's what we're
talking about with motivated light
there's something inside of the frame
that's motivating this key light in this
instance it's this giant window so as
you can see here this key light is
giving a really nice soft fall off on
her face it's kind of got a little bit
of a rembrandt triangle here which is a
really popular lighting technique and
it's overall just looks really pleasing
and because this light source is such a
big light source and it's so close to
her face it's just giving really nice
soft shadows but it doesn't look too
sourcy or overdone it looks really
natural so if i turn this light on and
off you can kind of see what i'm talking
about this is with the key light off and
when i turn it on it just looks like
nice and natural she pops from the
background but it doesn't look too
sourcy and you can kind of see in her
eyes
you can see the soft box there which
gives a really nice catch light in her
eyes all right so next up let's talk
about this hair light right here so i'll
turn it on and off so you can kind of
see what i'm talking about and this hair
light is being lit by an amaran p60c and
i've got it at about 30 percent and it's
really subtle it's just enough to kind
of help give her a little bit of an edge
right here
and give her a little bit of dimension a
little bit more exposure on this side of
her face really just her hair you can
see when i told it on and off it's
pretty subtle but with it it just kind
of makes her pop
now this light is being motivated by
this practical so this practical is
serving two purposes number one it looks
good in the set it's acting
as a practical practical lights or
essentially any light source that is in
the frame so that could be a candle a
lamp whatever the case may be so this
practical if i turn it on and off you
can see it's giving just a little bit of
exposure there on that back chair
but also it is serving as motivation
for this hair light in this kind of back
light right here so again if i turn off
the hair light you can see what's going
on here there's kind of nothing going on
when i turn it on you can see even just
on her shoulder right here it looks like
that light is coming actually from the
lamp instead of some artificial light
source wherever it may be all right so
those are the lights that are kind of
lighting the talent primarily we have
the key light which is the primary light
that's lighting chelsea and then we have
that practical in the background that's
motivating the hair light and the back
light so that being said there are a few
more things that we can do to really
kind of paint the scene a little bit
more i've always said that
the the scene is your canvas
the light is your paint and then the
modifiers are your paint brushes so
think of it that way we're adding a lot
of paint and paint brushes or adding
these strokes of light so this is what
we're going to start doing now is
starting out a little bit more texture
with different lights one of the first
things we're going to do is we're going
to try to balance the exposure of this
room a little bit more so that it
doesn't look too dark in the background
and what we're going to use for that is
an aperture 600d pro it's a really
bright light i've actually only got it
at about 37 so we probably could use
even a lower output light but this is
with the light that i have in my kit so
i'll show you what we've got going on
with that right here i've got the 600d
pro and i've got the f10 barn doors on
there and it's just simply throwing into
the ceiling here just to kind of give a
little bit of exposure and i'm using the
barn doors to help cut that light so it
doesn't hit in the corner over here so
it's not in frame but what this light is
doing is just giving a little bit of
exposure to the background here so once
again if i toggle this on and off you
can see how much of a difference this
makes so if you see right now
that background is pretty dark and this
interview setup just looks a little bit
too moody so what i do is adding that
600d just bouncing into the ceiling just
kind of lightens up
that room a little bit more and just
kind of gives the exposure a little bit
more balance so it just feels a little
bit more natural all right so next up
this is just a small little touch just
to make things a little bit more
balanced and look a little bit more
natural and that's what these two lights
the amaran t4cs so what i've got these
lights doing is essentially just giving
a little bit of exposure to this couch
so it just doesn't fall off into the
darkness so let's go and toggle these on
and off so you can see what i mean all
right so here's the shot without any of
the tube lights on and you can see
in my opinion i just think the couch
looks a little bit too dark there in the
corner so the first light we turn on is
this one right here and as you can see
just in the corner it's just got a
little bit of exposure there just to
kind of kind of mimic that light coming
in
through that window
and then next up this next lights
another tube light we have just turns on
and just again adds just a little bit of
exposure to the side
of that couch now what i've done here is
i've just added this little screen right
here
and that's really just to prevent any of
the light spill from these tube lights
because i don't have any grids or
anything for them
just prevents any of that exposure and
that light spill to affect any of the
light hitting the talent here and then
next up i just added this right here and
that's just to prevent the exposure up
here from really spilling onto that back
wall over there just so that this light
over here that we'll talk about in just
a second pops even more all right in the
final and last light that i added
for this scene was actually outside and
that's the aputure 600x pro which is a
fantastic light because it is by color
meaning you can change the color
temperature of it so i set this to about
4 500 kelvin and that's just kind of
giving a nice warm light coming through
kind of making it look like
you know late afternoon sun or something
like that coming through
and it's also kind of helping with
motivating the light even more now that
it's storming outside and we lost
quite a bit of light because of that
this is kind of still helping motivate
that key light and the other thing
that's doing is it's just adding a
little bit of texture to this back wall
because
as you can see there's nothing really on
this back wall
so having a little bit of texture some
shadow texture i really like seeing that
because it looks just nice and dramatic
and just kind of helps sell that there's
kind of some light sunlight coming from
outside and as you can see on this frame
with the 600x pro off it just looks kind
of flat and uninteresting but as soon as
i turn it on you can start seeing it's
got a lot more dramatic shadows it's
giving even a little bit of an edge to
that
lighter pillow back there it's kind of
giving a little bit exposure to that
plant back there that light there on
that window sill looks a lot more
dramatic but it bounces out the image
adds a lot more texture without it
looking distracting and this light is
actually a fantastic way to fake a
motivated light source so as you can see
here behind me this looks like there's
window light coming from behind me and
you don't see in this current frame you
don't see a window or anything like that
in the frame so say you actually didn't
have a window to begin with well you can
use attachments or you know use a cookie
or something to cut out a window shape
or something and throw the light through
that to create some kind of texture
pattern on that back wall and that kind
of helps fake motivation
for a key light so now that i've kind of
showed you each of these lights
individually now let's take a look at
this scene starting from scratch and
kind of build on the scene with one
light at a time just kind of show you
how each of these lights are affecting
the image and adding texture and
dimension to the overall image
[Music]
[Music]
[Music]
well i sure hope you were able to find
something helpful or useful in this
video thank you so much for watching
lighting plays such a massive role in
filmmaking and photography for that
matter so it's so important to
understand the basics and the only way
to get better at it is to just practice
practice practice well thank you so much
for watching and stay tuned for more
tips and tutorials
[Music]
you
Interactive Summary
Ask follow-up questions or revisit key timestamps.
This video explains how lighting can be used to add depth, shape, and texture to a two-dimensional image, making it appear more three-dimensional. The presenter, Tyler Edwards, demonstrates this by setting up lighting for an interview scene. He details the purpose and placement of each light, including the key light (a large softbox motivated by a window), a hair light (subtle, motivated by a practical lamp), a background light to balance exposure, tube lights to illuminate the couch, and an exterior light to add texture and motivate the overall lighting. The video emphasizes the importance of motivated lighting and how to use various tools and techniques to achieve a natural and visually appealing look.
Suggested questions
5 ready-made promptsRecently Distilled
Videos recently processed by our community
